A Flavour Chaser's Guide to Wick and Wire: New Gear Edition
Posted by Chris on
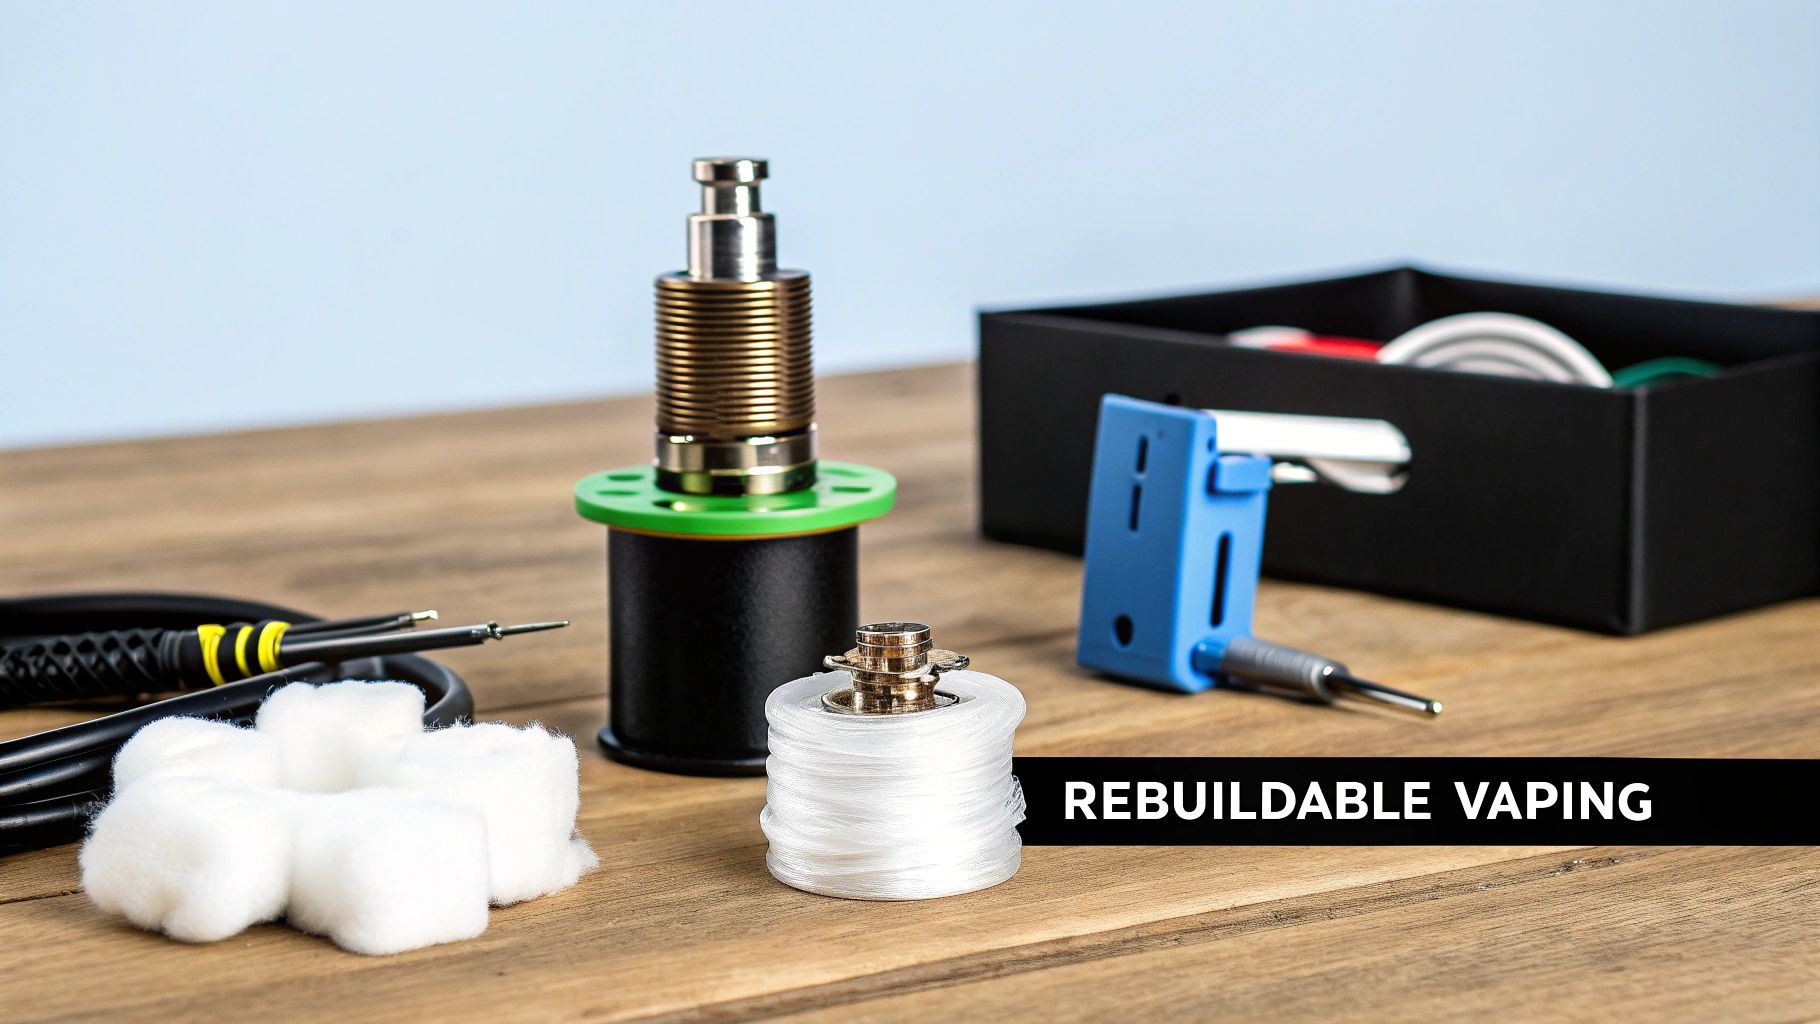
Diving into the world of rebuildable atomizers can feel like a big leap, but trust me, the payoff in flavour and control is absolutely worth it. This guide is all about getting you comfortable with wick and wire, taking you from curious to confident with practical, hands-on advice. We'll even look at some of our newest gear to help you build your best setup yet.
Your Journey Into Rebuildable Vaping
If you've ever been underwhelmed by a pre-made coil, you're in the right place. The art of twisting your own coils from simple wire and cotton is one of the most satisfying parts of vaping. It gives you the driver's seat, letting you dial in everything from the warmth of your vapour to the intensity of the flavour.
Think of this guide as a chat with a fellow builder. I'm skipping the overly technical jargon and focusing on the real-world stuff that actually makes a difference. I’ll share some of the little tricks I've picked up over the years that turned my own builds from frustrating to fantastic.
Why Build Your Own Coils?
So, is all the effort really worth it? Absolutely. For vapers who want more from their experience, the benefits are huge.
Here's what you can expect when you make the switch:
- Unbeatable Flavour: There’s nothing quite like the clean, pure taste from a freshly wicked, well-made coil. You’ll pick up on subtle notes in your e-liquid that you never even knew were there.
- Total Customization: You’re in charge of the resistance, the coil size, and how you wick it. This means you can craft a build perfectly matched to your atomizer, your mod, and your personal vape style—whether that's chasing massive clouds or pinpoint flavour.
- It's Cheaper in the Long Run: Let's be honest, this is a big one. A spool of wire and a bag of cotton will last you for months, costing way less than constantly buying packs of disposable coil heads.
Building isn't just about saving a few dollars or blowing bigger clouds. It's about the satisfaction of making something with your own hands that performs exactly the way you want. It creates a deeper connection to your gear and the hobby itself.
The community around rebuildables is growing for a reason. As more people get into it, the quality and variety of materials just keep getting better. It’s projected that retail vape shops will hold over 80% of the global market share by 2035, reaching a value of USD 8.26 billion. This growth is fueled by knowledgeable local shops that help vapers explore options like rebuildables with confidence.
Our goal here is to give you the foundation you need to get started. From picking out your first wire to getting your wicking just right, every step is a chance to learn and perfect your craft. When you're ready, check out the new wick and wire we've added to our collection of rebuildables to find the perfect supplies for your first build.
Choosing the Right Wick and Wire Materials
Getting into rebuildables is where the real magic happens. The foundation of any killer setup isn't the fancy tank, but the materials you choose to build with. Picking the right wick and wire is less about technical specs and more about tuning your vape—from how warm the vapour feels to pulling every last flavour note out of your e-liquid.
Let's break down the options, starting with the heart and soul of your atomizer: the wire. Think of each type as having its own personality, and your job is to find the one that clicks with your style.
Decoding Your Vape Wire
Imagine vape wire like the engine in a car. Some are reliable, everyday drivers, while others are built for pure, high-octane performance. Getting a handle on the big three will set you up for success.
Here's what you'll most likely run into:
- Kanthal (KA1): This stuff is the undisputed champion for new builders, and for good reason. It’s a simple iron-chromium-aluminium alloy that’s a dream to work with. It holds its shape, is built like a tank, and you only ever use it in standard wattage mode. No fiddling with temperature control, just straightforward, reliable performance.
- Nichrome (Ni80): If you hate waiting for your coil to heat up, Ni80 is for you. This nickel-chromium alloy has a much faster ramp-up time than Kanthal, meaning you get vapour almost instantly when you hit the fire button. Keep in mind it has a lower resistance, so you’ll probably need to add an extra wrap or two compared to a Kanthal coil to hit the same resistance target.
- Stainless Steel (SS316L): This is the jack-of-all-trades. You can run Stainless Steel in regular wattage mode or in temperature control (TC) mode, which gives you a ton of flexibility. Vapers who chase the purest flavour often swear by SS316L for its crisp, clean profile. It's a bit springier and can be slightly more challenging to wrap perfectly, but many find the flavour payoff is well worth the effort.
A little insider tip: we’ve been loving the high-quality Ni80 fused Clapton wire that just landed. From personal experience, it's an absolute game-changer for getting dense clouds without muddying up the flavour. The complex build and rapid heating just work so well together.
Just as important as the material is the wire's gauge. You’ll see it written as "g" or "ga" (like 24g or 26g). It’s just a measurement of the wire’s thickness, and the rule is counter-intuitive: the higher the gauge number, the thinner the wire.
A thin wire (like 28g) has a higher resistance and heats up quickly. A thicker wire (like 24g) has lower resistance, takes a moment longer to get going, but can handle more power without a problem. If you're just starting, you can't go wrong with 24g or 26g Kanthal—it's the perfect middle ground.
Comparing Popular Vape Wire Materials
Picking a wire can feel overwhelming at first, so here’s a quick cheat sheet to help you find your match based on what you're looking for.
| Wire Type | Best For | Ramp-Up Time | Flavour Profile | Ease of Use |
|---|---|---|---|---|
| Kanthal (KA1) | Beginners and no-fuss wattage builds | Slower | Neutral | Very Easy |
| Nichrome (Ni80) | Instant firing and big cloud production | Very Fast | Slightly Warm | Easy |
| Stainless Steel (SS316L) | Crisp flavour and temperature control | Medium | Very Clean | Intermediate |
Ultimately, the "best" wire is totally subjective. My advice? Grab a small spool of each and see what you enjoy working with the most.
Finding Your Perfect Wicking Material
Once your coil is built, you need a wick. Its job is simple: soak up e-liquid and feed it to the coil. The quality of your wick makes a massive difference in flavour and performance.
When it comes to wicking, organic cotton is king. It absorbs well and provides a clean taste. But not all cotton is created equal.
- Organic Cotton Pads: This is the old-school, DIY-er’s choice. You’ll usually find them sold in squares (Muji pads are a classic example). They’re super cheap, but you’ll need to prep them by peeling the outer layers and cutting your own strips.
- Refined Cotton Strips: Brands like Cotton Bacon really simplified things. They process their cotton to remove any impurities, which means you get a pure, clean taste right off the bat. It comes in easy-to-pull strips, so you just grab what you need and go.
- Shoelace Cotton: This is easily the most beginner-friendly option out there. It’s basically pre-measured cotton strips with a little plastic tip on one end, just like a shoelace. You simply thread it through the coil, snip the ends, and you’re done. No more guessing if you have too much or too little. We actually just got some new shoelace cotton specifically sized for 3mm coils, which is perfect for most atomizers on the market today.
For my own builds, especially with complex dessert or fruit e-liquids, I almost always reach for a high-quality refined cotton strip. The break-in time is practically zero, so you get that true-to-the-bottle flavour from the very first puff.
Remember, the right wick and wire is the first, and most important, step towards crafting a vape that’s perfectly tailored to you.
How to Build and Install Your First Coils
Alright, this is where the real fun begins. We're about to turn a simple strand of wire into the heart and soul of your atomizer. Building your first coils is an incredibly satisfying process, and I'm here to walk you through it so you get it right the first time. The little details, from wrapping to installing, make a world of difference in your vape's flavour and performance.
Getting the Basics Right: Diameter and Wraps
First thing's first: you need to decide on the inner diameter (ID) of your coil. This is just the size of the hole down the middle. For most builds, a 3mm ID is the sweet spot and a perfect place for beginners to start. It gives you a fantastic balance between surface area for vapour and enough room for efficient wicking.
Once you’ve picked your diameter, you need to figure out how many wraps to make. It's simple: more wraps mean more wire, which means higher resistance. I usually suggest aiming for a target between 0.2 and 0.5 ohms for a regulated mod. This range typically delivers that perfect mix of warm vapour and rich flavour.
Wrapping Your Coils Like a Pro
To get started, you'll need a coiling jig or even just a screwdriver bit that matches your target ID. A dedicated tool definitely makes life easier. If you find yourself really getting into building, tools like the Coil Master 314 Clapton Maker can automate the tricky parts, but for now, let's stick to hand-wrapping.
Here’s a technique that has never failed me for getting tight, uniform wraps:
- Pin the wire firmly against the jig with your thumb, leaving a small "leg" sticking out to work with.
- Start wrapping the wire around the jig, maintaining firm and consistent pressure the whole time.
- As you go, try to keep each new loop nudged up snugly against the last one. Any gaps can create nasty hotspots later on.
Don't sweat it if your first couple of attempts look a bit wonky. It's a hands-on skill that just takes a little practice. The goal is a clean coil with no weird gaps.
Installing Your Coils on the Build Deck
Got your coil wrapped? Great. Now it's time to get it installed on your atomizer's build deck. This part is all about being precise.
Gently guide the coil's leads—the wire ends—into the post holes on your deck. You might need to wiggle it a bit to get it seated properly. Once they're in, tighten the post screws just enough to secure the coil. Don't crank down on them, or you might snap the wire.
Next up is one of the most critical steps: trimming those leads. Grab a pair of flush cutters and snip the extra wire as close to the posts as you possibly can. If you leave any bits sticking out, they can touch the metal cap and cause a short circuit, which is a serious safety no-no.
Positioning is everything. You want that coil sitting right in the centre of the build deck, with enough breathing room on all sides so it doesn't touch the deck or the inside of the top cap. Try to line it up perfectly with your atomizer's airflow vents—that’s the key to unlocking the best flavour.
This whole process revolves around getting your materials right from the start.
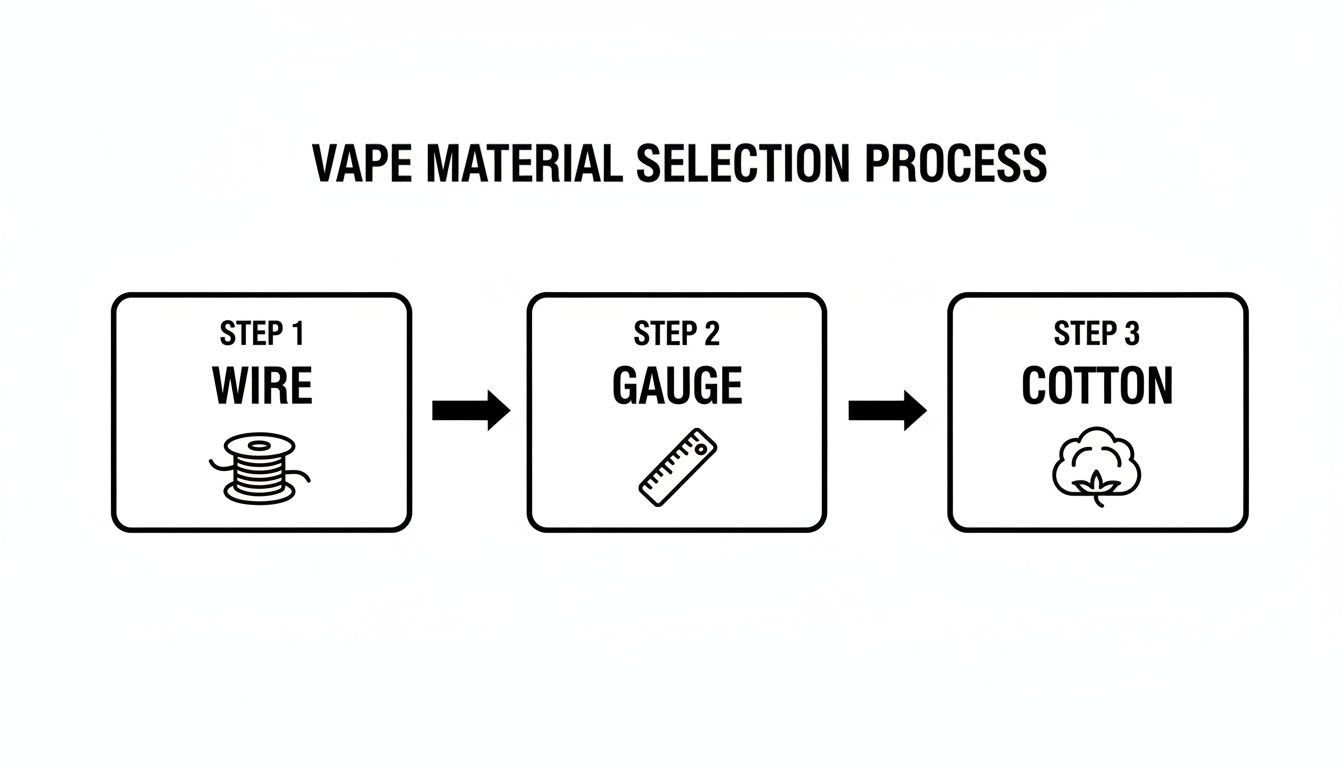
This flowchart breaks down the selection process, showing how you move from choosing a wire type, to its thickness (gauge), and finally to your cotton, with each choice influencing the next.
The Secret to a Perfect Glow
Now that your coil is installed, we need to fine-tune it and get rid of any imperfections. We're hunting for "hotspots"—annoying little areas on the coil that glow way brighter than the rest.
Start by pulsing your mod at a really low wattage, somewhere around 15-20W. The goal is to heat the coil up slowly. Watch it like a hawk. You're looking for a beautiful, even glow that starts in the middle and spreads outwards to the ends.
If you spot any glowing bright spots, let go of the fire button and let the coil cool down completely. Then, take a pair of ceramic-tipped tweezers and gently "strum" the coil like you’re playing a tiny guitar. This little trick helps even out the spacing between the wraps.
Keep repeating this process—pulse, cool, strum—until the coil glows perfectly from the inside out. A clean, even glow is the secret to getting pure flavour from the very first puff. It also burns off any lingering machine oil from the wick and wire manufacturing process, ensuring your e-liquid vaporizes cleanly.
It's never been easier for vapers to get into building. Here in Ontario, the number of vape shops jumped by a whopping 22.6% between 2016 and 2019, with a massive 40.3% surge in just one year after some regulatory changes. This explosion in local shops means more people have access to the gear and advice needed to perfect their builds. You can read more about this growth in this detailed study.
Mastering Your Wicking Technique

You’ve perfectly wrapped, installed, and pulsed your coils. Now for the final, and arguably most important, step: wicking. This is where a good build becomes a great one. Honestly, mastering your wicking is the single biggest thing you can do to get incredible flavour and avoid those frustrating dry hits or messy leaks.
People often say wicking is an art form, and they’re not wrong. It’s a skill that comes with feel and experience, but if you understand a few key principles, you can skip a lot of the painful trial-and-error. A perfect wick feeds e-liquid to your coil exactly when it's needed, making sure every puff is just pure, clean flavour.
Finding the Goldilocks Zone of Cotton
The most common mistake I see builders make is simply using the wrong amount of cotton. It’s a delicate balance that can make or break your vape. Learning to eyeball the right amount just takes a bit of practice.
Let’s look at the two extremes and why they’re so bad for your build:
- Too Little Cotton: If your cotton just glides through the coil with zero resistance, you haven't used enough. This leaves gaps for e-liquid to flood the deck, causing gurgling, spit-back, and eventually, a leaky tank.
- Too Much Cotton: On the flip side, if you’re twisting and forcing the cotton through, it’s way too much. A wick that’s packed in too tight can't absorb liquid fast enough, which we call "choking" the wick. This is what causes that dreaded dry hit—that awful, burnt taste when the coil vaporizes dry cotton.
Your goal is what I call the "Goldilocks Zone." You want just enough cotton so it feels snug pulling through the coil. There should be a slight, firm resistance, but it shouldn't bunch up or bend your wraps.
Exploring Popular Wicking Methods
Sure, just pulling a strip of cotton through your coil works fine. But over the years, the community has come up with some clever methods to really maximize performance. One of the most famous is the Scottish Roll, designed to hold more juice without choking off the flow.
You basically take a pad of cotton, gently stretch it out until it's thin and wispy, and then roll it up into a tight tube. This creates way more internal surface area for the liquid to travel along, meaning your wick stays saturated for longer.
From my own experience, the Scottish Roll is a game-changer for single-coil RTAs where you really need efficient juice flow. It helps kill dry hits on longer drags and seems to pull out deeper notes in complex dessert flavours.
Another great trick is the "Dam Method," which is perfect for RDAs. Instead of tucking long tails down into a deep juice well, you trim the wicks shorter and fluff them out to create a sort of "dam" of cotton at the base of the deck. This method is amazing at soaking up every last drop of e-liquid.
Fluffing, Trimming, and Tucking Your Wicks
Once the cotton is through the coil, it’s time for some final grooming. First, you need to fluff those ends. Take a pair of sharp, clean tweezers and gently comb out the ends of your wick. This separates the compressed fibres and opens up thousands of tiny channels for the e-liquid to flow into. Using a good set of white ceramic tweezers is perfect for this, as they won’t short your coil if you accidentally touch it while pulsing.
Next up, the trim. The right length really depends on your specific atomizer, but a good rule of thumb is to cut the wick just long enough so it lightly touches the bottom of the juice well or channel. Too long, and it can choke the flow; too short, and you'll get leaks.
Finally, gently tuck the fluffy ends into the wicking channels. The key word here is gently. Don't cram them in there. The cotton needs room to breathe and expand as it soaks up juice. Think of it as guiding the wick home, not stuffing it in.
The All-Important Priming Process
Alright, you’re on the home stretch. You’ve built, installed, and wicked your coils. The very last step before you can actually vape is priming. This just means you're manually soaking your new wick and coil with e-liquid before firing it up.
Start by dripping a small amount of your e-liquid right onto the coil. You'll see the cotton instantly suck it up. Keep adding a few drops at a time, letting it absorb, until all the visible cotton is completely saturated.
Once it looks soaked, I like to give the mod a few gentle, low-wattage pulses. This helps the liquid work its way into the very centre of the wick and makes sure your entire wick and wire setup is ready for that perfect first hit.
Keeping Your Coils Clean, Safe, and Flavourful
Building the perfect coil is just the first step. The real art lies in keeping it running at its peak. Proper maintenance is what separates a good vape from a great one, ensuring you get that crisp, clean flavour day in and day out, all while keeping things safe.
Let's get into the routine of cleaning, troubleshooting, and the safety checks that every builder should know by heart.
Reading the Signs: When to Clean and Re-Wick
Your build will tell you when it needs a little TLC. The most obvious signal? The flavour starts to drop off. That amazing taste you got from a fresh build begins to feel muted or just... off.
If you take a peek at your cotton, you'll probably see why. Dark, caramelized gunk from your e-liquid, especially if you're a fan of sweeter juices, is the main culprit.
Here’s what to watch out for:
- Dull Flavour: This is always the first sign. Your go-to juice just isn’t hitting the same.
- Gunk on the Coils: You'll see a dark, crusty layer building up on the wire. This residue kills flavour and performance.
- A Funky, Burnt Taste: Even if your wick is soaked, you might get a slightly burnt taste. That's the gunk on your coils cooking along with your e-liquid.
As a rule of thumb, a daily vaper should probably plan on re-wicking every 3-4 days. If you're all about those super-sweet dessert flavours, you might find yourself doing it every couple of days to keep things tasting fresh.
This hands-on maintenance is a huge part of the hobby, and it's something local vape shops are fantastic at teaching newcomers. Here in Ontario, for instance, these shops have become crucial hubs for the community. While a lot of provincial data focuses on the cannabis vape market, which consistently makes up 19-23% of sales, the retail network itself is a model of success. With 1,721 authorized stores across the province, vapers have incredible access to expertise and supplies, and the focus on quality keeps product complaints remarkably low. You can dive deeper into Ontario's robust retail landscape here.
The Classic Dry Burn: Bringing Coils Back to Life
After you’ve carefully pulled out the old, gunked-up cotton, you don’t always need to toss the coil. A quick "dry burn" can often get it back to near-new condition.
The trick is to be gentle. Pulse your mod at a low wattage—somewhere around 15-20W is perfect. You just want to heat the coil enough for the gunk to flake off as ash. You're aiming for a dull, cherry-red glow, not a blazing orange.
Once you’ve pulsed it a few times, let the coil cool down completely. You can then gently brush it with a coil-building tool or even give it a quick rinse under some warm water. Just make sure it’s bone dry before you put a new wick in.
Troubleshooting the Common Headaches
Even seasoned builders run into hiccups. A burnt taste or a leaky tank can be incredibly frustrating, but thankfully, the solution is usually pretty simple.
| Problem | What's Likely Happening | How to Fix It |
|---|---|---|
| Burnt or Dry Hits | Your wick is packed too tightly, or you didn't use enough cotton. | Ease up on the cotton. It should feel snug inside the coil, not strangled. |
| Leaky Atomizer | There isn't enough cotton filling the juice wells. | Make sure your wick tails are fluffy and fill the wicking ports completely without being crammed in. |
| Gurgling or Spit-back | The coil is flooded because the wick is too thin. | This is the opposite of a dry hit. Try using a bit more cotton for a snugger fit. |
| Muted Flavour | You've got hotspots on the coil, or the wick is just old. | Check for an even glow from the centre out. If the coil looks good, it's just time for a fresh wick. |
The Non-Negotiables: Safety First, Always
Building is a fun, rewarding hobby, but safety has to be your top priority. The single most important thing to understand is Ohm's Law and basic battery safety. Ohm's Law is the formula that governs the relationship between resistance, voltage, and current, and it’s what keeps you from pushing your batteries into the danger zone.
Always, always use a dedicated resistance checker or a reliable mod to check your coil’s resistance before you ever fire it.
And then there are your batteries. They’re the heart of your setup, so treat them with the respect they deserve.
- Check Your Wraps: Look over your batteries every time you handle them. Any nicks or tears in the plastic wrap? Re-wrap them immediately or safely dispose of them. A tiny tear can cause a dangerous short.
- Use a Proper Charger: Don’t charge your batteries through your mod’s USB port. An external, dedicated charger is safer and better for the lifespan of your cells.
- Store Them Properly: Never, ever carry loose batteries in your pocket or bag. Always keep them in a cheap plastic battery case to prevent them from making contact with keys, coins, or anything else metal.
Making these simple maintenance and safety checks a regular habit will ensure every vape you take is not just flavourful, but perfectly safe.
Alright, let's wrap this up by hitting some of the questions we get asked all the time at the shop. These are the little details that can trip up anyone, from first-time builders to seasoned pros, so let's clear the air.
How Often Should I Be Re-wicking?
You'll probably find yourself wanting a fresh wick every 3-7 days. The real deciding factor here is your e-liquid. If you're into those super-sweet, dessert-style flavours, you'll be on the shorter end of that window because sweeteners caramelize and junk up the cotton fast.
The best indicator? Your taste buds. When the flavour starts to get a bit dull or just tastes… off, that’s your cue. A quick re-wick is often all it takes to make a build taste brand new again.
How Long Will My Coils Actually Last?
The metal coil itself is the marathon runner here—it can easily last for weeks, sometimes even a month or two, if you treat it right. You definitely don't need to toss it every time you change the cotton.
Instead, give it a good clean. Once the old cotton is out, give the coil a few gentle pulses at a low wattage until the gunk burns off. Let it cool down, then you can give it a quick brush or a little rinse with water. It's time for a total replacement only when the coil gets misshapen, has black spots that just won't burn off, or the resistance reading starts jumping around.
What’s the Best Wire for a Beginner to Use?
Hands down, Kanthal A1 (KA1) is where you want to start. It’s just so easy to work with. It holds its shape beautifully while you're wrapping and it's tough enough to handle a few fumbles while you're getting the hang of things.
The big advantage is that Kanthal is strictly for wattage mode. This means you don't have to worry about the complexities of temperature control right off the bat. I always suggest grabbing some 24 or 26 gauge Kanthal to start—it's the perfect middle ground for a ton of different builds and gives a great balance of quick ramp-up and solid flavour.
Why Does My Fresh Build Taste Like Metal?
That slightly metallic tang from a brand-new build is super common, and luckily, it usually disappears after a few puffs. It’s typically caused by one of two things: leftover machine oil from the manufacturing process or "hotspots" on your coil.
Here’s how to avoid it. First, always give your hands a good wash before touching your wire or cotton. After you've installed the new coil, and before you add the wick, pulse it gently on a low wattage. You're looking for a nice, even glow that starts in the middle and spreads outwards.
If you see any angry-looking bright spots, just give them a light "strum" with your ceramic tweezers until they disappear. This little step burns off any residue and fixes hotspots, which is key to getting clean, pure flavour from your wick and wire from the very first vape.
Ready to get building? At Wii Vape, we’ve got all the top-shelf wire, premium cotton, and essential tools you could possibly need to nail your perfect setup. Check out our full collection of rebuildable supplies and get free same-day delivery on orders over $100 in the GTA.